Hardware Is Hard: Lessons I Learned Building Burro’s First Product
- Jake Koenig

- Jan 6
- 3 min read
Anyone who's built a hardware product knows the phrase, "hardware is hard" exists for a reason. Here's my story of understanding what that really means, firsthand.
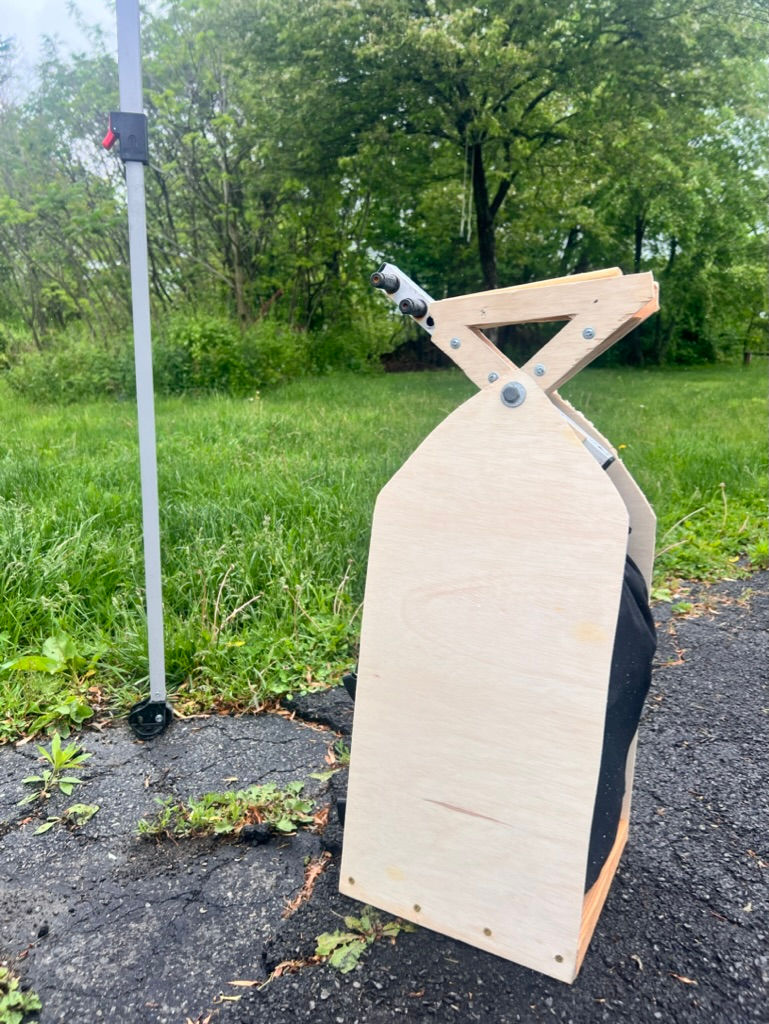
2025 was a big year for Burro, marking our official launch in shipping out our first product (you can watch our short video of our launch day here). This journey started a little over a year ago when my popup canopy tent collapsed in the rain, which sparked my interest (and subsequent obsession) with this space.
 |  |
After some initial exploration, I decided to design a tent weight as our first product rather than a whole tent (more details on that decision here). I’d spent years as product manager for Citi Bike, so I was familiar with how people interact with physical products, but this was my first time building one.
The learning curve was steep. You can read plenty of startup “lessons,” but sometimes you have to live them to actually learn them. Here are the biggest lessons I had to live to learn.
1) Focus on your core functionality
I wasted early time perfecting small details instead of proving the core idea.
For example, I obsessed over getting the handle to stay upright when the bag sat on the ground—it seemed like an important user interaction. Turns out it wasn’t. In the final design the handle flops down naturally, which actually packs better in a car/truck. The real lesson: make something that works, get it in front of people, then refine.
2) Find your DFM engineer early
"Design for Manufacturing" was a new phrase to me. I thought once I had a working prototype, I just needed an engineer to take it across the finish line. I was way off. Bridging the gap between a handmade prototype and something scalable is its own discipline. The space between a working prototype and a ready-to-manufacture design is more vast and complex than I imagined. I wasted too much time making small refinements to the design myself with the misconception that I could get things close to a manufacturable design. I could have saved a lot of time by finding my engineer way earlier in my journey.
 |  |
 |  |
3) Engineers have an aesthetic– hire for yours.
Every engineer brings a creative lens, just like a musician. Give four musicians the same tempo and key, and you’ll get four completely different songs. Hardware is no different. I needed someone who understood Burro’s aesthetic—simple, elegant, rugged. It took several false starts before I found the right fit for who to work with. Spend time identifying your own product aesthetic goals, and vet for that early in the process of finding an engineer.

4) Durability-test your manufactured samples.
This one still hurts a little. The samples looked great, and I trusted the durability of the core materials– thick steel, aluminum, 600D fabric. When the final version arrived, I did a few quick tests, everything seemed solid, and I gave production the green light. A month later, the rubberized coating started tearing under shear. Common coatings hold up fine on dumbbells or tools, but not under the specific stress our product sees. We ultimately found a solution, but we had to scrap the first batch, wasting money, materials, and setting back my launch by several months. It was a painful lesson, but the next round went through rigorous durability testing before getting my sign-off.

5) Start with small production runs.
Thankfully, I got this one right. Our design intentionally avoided big tooling costs so we could keep our first production order volumes small. That decision saved us. Losing one run hurt, but it didn’t sink us. I’ll keep scaling slowly, incrementally increasing production volume while we inevitably learn new improvements to make from getting these into the real world.
These lessons aren’t new or groundbreaking, but living them sharpened my instincts and made me a better hardware developer. I’m already applying them to Burro’s next products, and I humbly await the next set of lessons I’ll have to live to learn.


Comments